
Crafting Sweet & Nutritious Carrot Puree for Your Little One: A Gentle Guide
Welcome, wonderful parent! If you’re here, chances are you’re embarking on the exciting adventure of introducing solid foods to your baby. It’s a milestone filled with questions: "Where do I start?", "Is it safe?", "How do I make sure my little one gets the best nutrients?" These feelings are completely normal, and you’re not alone. Many parents find themselves wondering about the best way to prepare those first precious spoonfuls.
That’s where homemade carrot puree comes in! It’s a fantastic first food – naturally sweet, packed with essential vitamins, and wonderfully versatile. This guide is designed to be your friendly companion, walking you through every simple step, from choosing the perfect carrot to blending it into a silky-smooth delight your baby will adore. We’ll banish any worries and empower you with the knowledge to create nourishing, homemade meals with confidence, ensuring a happy and healthy start to your baby’s solid food journey.
Get ready to discover just how easy and rewarding it can be to prepare delicious, wholesome carrot puree right in your own kitchen. You’re about to become a baby food maestro, and your little one is in for a treat!
Preparing Your Carrots for Pureeing Perfection
Before we even think about cooking, let’s talk about the star of our show: the humble carrot! Choosing the right carrots and preparing them properly lays the foundation for a truly delicious and nutrient-rich puree. Think of this as the crucial first act in your baby food culinary adventure.
It’s all about ensuring freshness, cleanliness, and consistency for the best possible outcome. Don’t worry, it’s simpler than it sounds, and we’ll walk through each step with ease.
Taking these initial steps with care means your baby will receive the freshest, most wholesome goodness in every spoonful, setting them up for a fantastic first food experience.
Choosing the Best Carrots for Baby’s First Bites
When you’re at the grocery store or farmer’s market, look for carrots that are firm, bright orange, and feel heavy for their size. Avoid any that look limp, cracked, or have soft spots, as these are signs of older, less fresh produce. Freshness not only contributes to better flavor but also ensures a higher nutritional content for your growing infant.
Many parents wonder about organic versus conventional carrots. While it’s a personal choice, organic carrots can offer peace of mind, as they are grown without synthetic pesticides and fertilizers. However, if organic isn’t accessible or within your budget, conventional carrots are perfectly fine as long as they are thoroughly washed and prepared. The key is to prioritize what works best for your family while ensuring safety and quality.
Consider the size of the carrots too; medium-sized carrots are often ideal because they tend to be sweeter and less woody than very large ones. Baby carrots, while convenient, are sometimes older and pre-peeled, which can mean less flavor and potentially fewer nutrients compared to fresh, whole carrots. Opt for whole carrots whenever possible for optimal taste and texture in your homemade baby food.
Gentle Cleaning and Efficient Peeling Techniques
Once you have your beautiful carrots, the next step is to give them a good wash under cool running water. Use a clean vegetable brush to gently scrub away any dirt, especially if you’re using conventional carrots, to remove potential pesticide residues or soil particles. Even if you plan to peel them, a preliminary wash is always a good practice to ensure cleanliness.
Peeling carrots is generally recommended for baby food, as the skin can be tough and difficult to puree smoothly, potentially leaving tiny fibrous bits in your baby’s first meal. A standard vegetable peeler works wonders here, making the process quick and efficient. Simply glide the peeler down the length of the carrot, rotating it until all the skin is removed.
After peeling, remember to trim both ends of the carrot – the green leafy top and the thin, pointy bottom. These parts can also be tough or have an undesirable flavor. By meticulously cleaning and peeling your carrots, you’re ensuring that your baby’s first taste of this vibrant vegetable is as smooth, palatable, and safe as possible, contributing to a positive introduction to solid foods.
Mastering the Art of Uniform Chopping for Even Cooking
Now that your carrots are clean and peeled, it’s time to chop them into pieces that are ready for cooking. The secret to perfectly cooked carrots, especially for pureeing, is uniformity in size. If your carrot pieces are uneven, some will cook faster and become mushy while others remain hard, leading to an inconsistent texture in your final puree.
Aim to chop your carrots into roughly 1/2 to 1-inch thick rounds or cubes. This size allows for even heat distribution during cooking, ensuring that every piece becomes tender at the same rate. You can slice them into coins, dice them into cubes, or even cut them into small chunks – the shape doesn’t matter as much as the consistent size.
A sharp knife makes this task much easier and safer. Take your time, focus on creating similar-sized pieces, and before you know it, you’ll have a pile of perfectly prepped carrots ready for the next exciting stage: cooking. This attention to detail in chopping will pay off immensely, guaranteeing a smooth and delightful texture for your baby’s nutritious carrot puree.
Steaming or Boiling for Perfect Softness
Now that your carrots are prepped and ready, it’s time to cook them until they’re perfectly tender – soft enough to be easily mashed or blended into a smooth puree. The goal is to achieve a texture that melts in your baby’s mouth, making it easy for them to swallow and digest. Choosing the right cooking method can also help preserve those wonderful nutrients we want our little ones to enjoy.
While there are various ways to cook vegetables, steaming and boiling are the most common and effective methods for baby food preparation. Each has its own advantages, and we’ll explore both so you can choose the one that best suits your needs and kitchen setup. Remember, the ultimate aim is a soft, safe, and delicious carrot for your baby.
No matter which method you choose, the key is to cook the carrots until they are very tender, almost falling apart. This ensures that the final puree will be wonderfully smooth and easy for your baby to enjoy. Let’s dive into the specifics of each cooking technique.
The Gentle Power of Steaming: Maximizing Nutrients and Flavor
Steaming is often considered the gold standard for cooking vegetables for baby food, and for good reason! This gentle cooking method exposes the carrots to steam rather than direct contact with water, which significantly helps in retaining more of their vital nutrients like Vitamin A and C, as well as their natural sweetness and vibrant color. It’s like giving your carrots a warm, spa-like treatment.
To steam your carrots, you’ll need a steamer basket or an insert that fits snugly into a pot with a lid. Pour about an inch or two of water into the bottom of the pot, ensuring the water level is below the bottom of the steamer basket. Place your uniformly chopped carrot pieces into the basket, cover the pot tightly, and bring the water to a boil over medium-high heat. Once the water is boiling, reduce the heat to a simmer.
Steam the carrots for about 10-15 minutes, or until they are fork-tender. This means a fork should easily pierce through a piece of carrot with minimal resistance. Keep an eye on the water level to prevent the pot from boiling dry. Steaming is not only nutrient-preserving but also incredibly simple, making it a favorite for busy parents crafting wholesome baby food.
Understanding the Art of Boiling for Baby Food
While steaming is preferred for nutrient retention, boiling is also a perfectly acceptable and quick method for softening carrots for baby puree, especially if you don’t have a steamer basket handy. It’s straightforward and gets the job done efficiently, ensuring your carrots reach that desired tender consistency. Just be mindful that some water-soluble vitamins might leach into the cooking water.
To boil your carrots, place your chopped pieces into a saucepan and cover them with just enough water to submerge them completely. Using less water can help minimize nutrient loss. Bring the water to a rolling boil over high heat, then reduce the heat to a medium simmer.
Boil the carrots for approximately 10-15 minutes, or until they are very tender when pierced with a fork. Once cooked, carefully drain the carrots, reserving some of the cooking water. This reserved water, which contains some leached nutrients, can be used later to thin your puree to the perfect consistency. Boiling is a reliable method that consistently delivers soft carrots, ready for blending.
How to Know When Your Carrots Are Perfectly Tender
Regardless of whether you choose to steam or boil, knowing exactly when your carrots are "done" is crucial for achieving the ideal puree texture. Overcooked carrots can become overly mushy and lose some flavor, while undercooked ones will be too firm to blend smoothly, leaving your baby with lumpy surprises. The goal is that perfect balance of softness.
The best test for doneness is the "fork test." Simply take a piece of carrot from the pot or steamer and try to pierce it with a fork. If the fork slides through easily with little to no resistance, your carrots are perfectly tender and ready for the next step. They should feel soft, not crunchy or resistant.
If your carrots still feel a bit firm, continue cooking them for a few more minutes and retest. It’s always better to check frequently towards the end of the cooking time to avoid overcooking. Once they reach that ideal tenderness, immediately remove them from the heat and prepare them for blending. This careful attention to doneness ensures a wonderfully smooth and palatable puree for your little one.
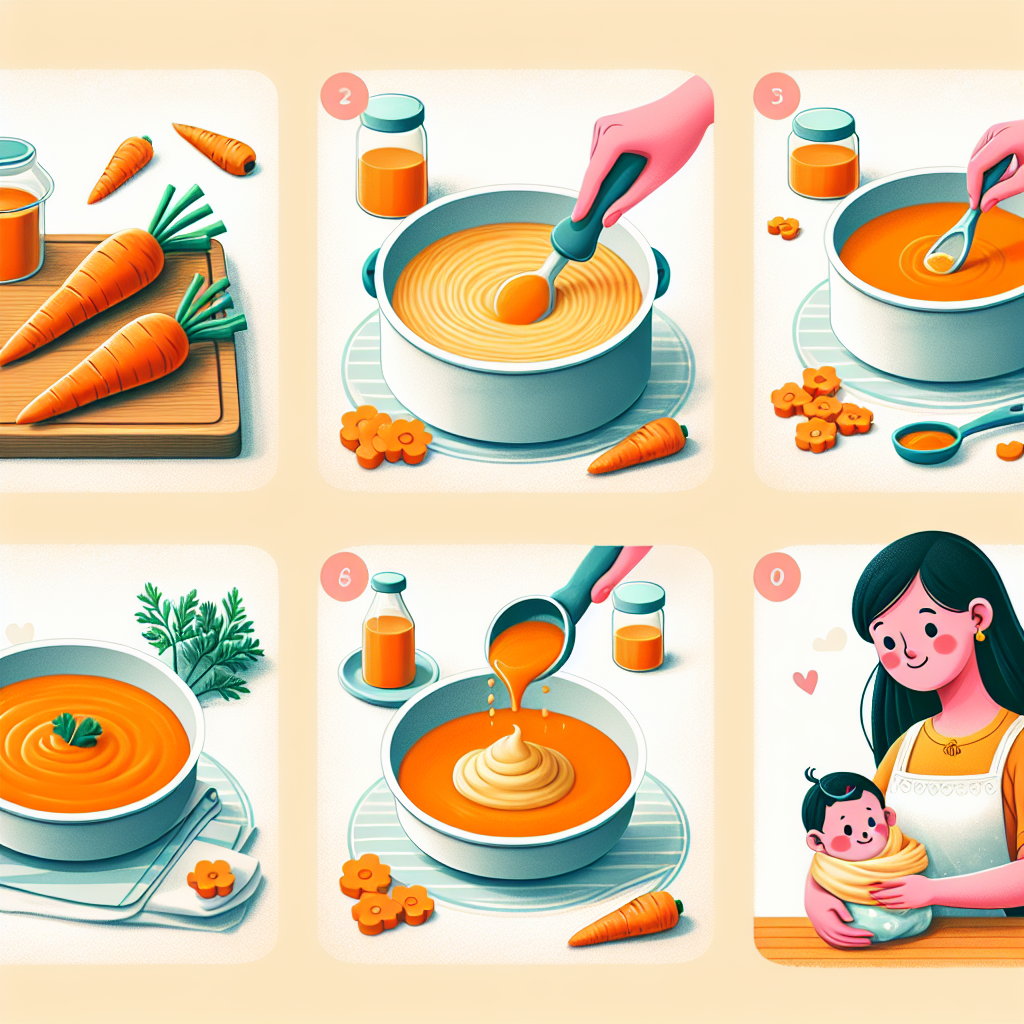
Blending Carrots into Smooth Baby Puree
You’ve successfully cooked your carrots to tender perfection – now comes the magic! Transforming those soft, vibrant pieces into a silky-smooth puree is the final step before your baby gets to enjoy their first taste. This stage is all about achieving that ideal consistency, which is crucial for safe and enjoyable feeding, especially for new eaters.
The right equipment, combined with a little technique, will ensure your carrot puree is wonderfully uniform and free of any lumps. Remember, we’re aiming for a texture that’s easy for your baby to swallow, almost like a thick liquid. Don’t be afraid to experiment a little to find what works best for your specific tools and your baby’s preferences.
Let’s explore the various blending options available and delve into the secrets of achieving that dreamy, smooth texture. You’re just moments away from creating a homemade masterpiece for your tiny diner!
Selecting Your Pureeing Powerhouse: Blenders, Processors, and Immersion Blenders
Choosing the right tool can make all the difference in achieving that perfectly smooth texture for your homemade baby food. Each type of appliance has its own strengths, so consider what you already have or what might be a good investment for your baby food journey. The good news is, you likely already own something that will work beautifully.
A traditional countertop blender is excellent for creating very smooth purees, especially larger batches. Its powerful motor and sharp blades can easily break down cooked vegetables, yielding a consistent texture. Just be sure to add enough liquid to help the blades move freely. A food processor is another fantastic option, particularly if you’re making smaller batches or want a slightly thicker, less watery puree. It excels at chopping and can produce a smooth consistency, though sometimes it might require a bit more scraping down the sides.
For ultimate convenience and easy cleanup, an immersion blender (also known as a stick blender) is a game-changer. You can puree the carrots right in the pot they were cooked in, minimizing extra dishes. While powerful, an immersion blender might take a little more effort to achieve an absolutely lump-free consistency compared to a high-speed countertop blender, but it’s incredibly versatile for small portions. Whichever tool you choose, ensure it’s clean and ready to tackle those tender carrots!
Achieving That Dreamy, Silky Smooth Texture
Once your carrots are cooked and your blending tool is ready, it’s time to transform them into a luscious puree. For the smoothest results, it’s best to blend the carrots while they are still warm, but not piping hot. This helps them break down more easily. Carefully transfer the cooked carrots to your chosen blender, food processor, or leave them in the pot if using an immersion blender.
Now, for the magic ingredient: liquid! To achieve that ideal, velvety consistency, you’ll need to add some liquid. The best options are breast milk, formula, or the reserved cooking water from steaming or boiling. Start with a small amount, perhaps a quarter cup for every cup of cooked carrots, and begin blending. You can always add more liquid gradually, a tablespoon at a time, until you reach your desired consistency. It’s easier to thin out a thick puree than to thicken a thin one!
Blend until there are no visible lumps and the puree is completely smooth. This might take a minute or two, depending on your appliance. For an extra-fine texture, especially if you have an older or less powerful blender, you might consider pressing the puree through a fine-mesh sieve or strainer after blending. This step is optional but ensures ultimate smoothness, perfect for the earliest stages of solid food introduction.
Troubleshooting Texture: Too Thick, Too Thin, or Lumpy Puree?
Don’t worry if your first batch isn’t absolutely perfect; making baby food is a learning process, and texture issues are common. If your carrot puree turns out too thick, it’s an easy fix! Simply add more liquid – breast milk, formula, or cooking water – a tablespoon at a time, blending well after each addition until you reach the desired consistency. Remember, you want it to be smooth and pourable, like a thin applesauce or thick soup.
On the flip side, if your puree is too thin or watery, you have a couple of options. You can try adding a bit more cooked carrot (if you have extra) and blending again, or you can gently heat the puree in a small saucepan over low heat, stirring constantly, to allow some of the excess moisture to evaporate. Be careful not to scorch it, and ensure it cools completely before serving. Alternatively, if your baby is ready for slightly thicker textures, a slightly thinner puree is often still perfectly acceptable.
If you find your puree is lumpy, despite blending, don’t despair! This often happens if the carrots weren’t cooked tender enough, or if your blender isn’t quite powerful enough. Try blending again for a longer duration, ensuring all pieces are making contact with the blades. If lumps persist, you can press the puree through a fine-mesh sieve or strainer using the back of a spoon. This will catch any stubborn bits and leave you with a beautifully smooth consistency, ensuring your baby’s first experience with solids is delightful.
Storing Your Homemade Carrot Puree: Freshness & Convenience
Congratulations, you’ve made a beautiful batch of homemade carrot puree! Now, let’s talk about how to keep it fresh and convenient for future meals. Batch cooking baby food is a lifesaver for busy parents, ensuring you always have healthy, wholesome options ready to go, even on the most hectic days. Proper storage not only preserves flavor and nutrients but also guarantees food safety for your little one.
You have excellent options for storing your pureed carrots, whether you plan to use them in the next day or two, or want to stock up for weeks to come. Understanding the best methods for refrigeration and freezing will empower you to efficiently manage your baby’s mealtime needs. This allows you more precious time to spend cuddling your little one, rather than constantly cooking.
Let’s explore the best ways to keep your carrot creations fresh, safe, and ready for those hungry little mouths. From fridge-friendly containers to freezer-savvy tricks, we’ve got you covered.
Refrigeration: Short-Term Solutions for Quick Meals
For immediate use or meals within the next couple of days, refrigerating your freshly made carrot puree is the perfect solution. Once the puree has completely cooled to room temperature, transfer it into airtight containers. Small, individual portion-sized containers are fantastic for this, as they make it easy to grab and go for a single meal without disturbing the rest of your batch.
Glass containers with secure lids are an excellent choice as they are non-reactive, easy to clean, and don’t absorb odors or colors. Food-grade plastic containers are also fine, but ensure they are BPA-free. Proper sealing is key to keeping air out and preventing spoilage, maintaining the freshness and flavor of your vibrant carrot puree.
Homemade carrot puree can typically be stored safely in the refrigerator for up to 3 days. Always label your containers with the date it was made so you can easily keep track of freshness. This short-term storage method is ideal for preparing a few days’ worth of meals, offering convenience without the need for thawing.
Freezing for Future Feasts: Batch Cooking Made Easy
Freezing is truly the superhero of baby food storage, allowing you to prepare larger batches and have wholesome meals ready for weeks. It’s a fantastic way to save time and ensure a consistent supply of nutritious food. The key is to freeze in small, usable portions that can be easily thawed when needed.
Ice cube trays are your best friend here! Once your puree has cooled, spoon it into clean ice cube trays. Each cube typically holds about 1 ounce of puree, which is a perfect portion size for new eaters. Cover the trays with plastic wrap or a lid to prevent freezer burn and odor absorption, then place them in the freezer.
Once the cubes are completely frozen solid (usually after 4-6 hours or overnight), pop them out of the trays and transfer them into freezer-safe bags or airtight containers. Squeeze out as much air as possible before sealing the bags to prevent freezer burn. Don’t forget to label each bag or container with the date and contents (e.g., "Carrot Puree – 10/26"). Properly stored, homemade carrot puree can last in the freezer for up to 3 months, giving you a wonderful stash of ready-to-eat meals.
Safe Thawing and Reheating Practices
When it’s mealtime, safely thawing and reheating your frozen carrot puree is just as important as the preparation and storage. Always plan ahead to ensure the puree is thawed thoroughly and heated to a safe temperature before serving to your little one. Proper handling prevents bacterial growth and ensures a delicious meal.
To thaw frozen puree cubes, you have a few options: The safest method is to transfer the desired number of cubes to a small, covered container and let them thaw in the refrigerator overnight. For a quicker thaw, you can place the container in a bowl of warm water or use the defrost setting on your microwave. Always stir the puree after thawing to ensure even temperature and consistency. Never thaw frozen baby food at room temperature for extended periods.
When reheating, gently warm the puree in a small saucepan over low heat, stirring frequently, or in the microwave in short bursts, stirring well in between to eliminate hot spots. Always test the temperature of the puree on the back of your wrist before serving it to your baby to ensure it’s comfortably warm, not hot. Discard any leftovers that your baby doesn’t finish from their bowl, and never re-freeze thawed puree. These practices ensure every meal is safe, warm, and ready for your hungry little eater.
Beyond the Puree: Introducing and Enjoying Carrots
You’ve mastered the art of making carrot puree – fantastic! But the journey doesn’t end there. Introducing this vibrant, sweet vegetable to your baby is a wonderful experience, and there are many ways to make it fun, engaging, and nutritionally rich. Remember, baby’s first foods are not just about nutrition; they’re about exploring new tastes, textures, and developing a positive relationship with food.
Carrots are incredibly versatile, and once your baby is comfortable with their smooth texture, you can begin to gently expand their culinary horizons. This phase is all about patience, observation, and celebrating every tiny spoonful your baby enjoys. Don’t put pressure on yourself or your little one; every baby progresses at their own pace.
Let’s explore how to make the introduction of carrot puree a delightful experience, how to combine it with other wonderful foods, and what exciting texture progressions lie ahead. Your baby’s food adventure is just beginning!
Introducing Pureed Carrots to Your Little One
The first time you offer a spoonful of carrot puree to your baby is a memorable moment! Ensure your baby is showing signs of readiness for solids, such as being able to sit with support, having good head control, and showing interest in food. Choose a time when your baby is well-rested and not overly hungry or tired – perhaps mid-morning or mid-afternoon.
Start with just a small amount, maybe a teaspoon or two, offered on a soft-tipped baby spoon. Don’t be surprised if most of it ends up on their chin or bib at first! This is completely normal. Focus on making the experience positive and pressure-free. Let your baby explore the spoon, the texture, and the taste at their own pace. Some babies might open wide immediately, while others might need a few tries over several days to accept a new flavor.
Offer one new food at a time for 3-5 days before introducing another new food. This "wait and see" approach helps you identify any potential allergies or sensitivities. Carrots are generally well-tolerated, but it’s always good practice. Celebrate every tiny bite and every happy gurgle; you’re building a foundation for healthy eating habits!
Creative Combinations: Pairing Carrots with Other Baby-Friendly Foods
Once your baby has happily accepted plain carrot puree for a few days, the fun of combining flavors begins! Carrots have a lovely natural sweetness that pairs beautifully with many other baby-friendly fruits and vegetables, adding variety and boosting the nutritional profile of their meals. This is where you can truly get creative and introduce a diverse palate.
Consider combining carrot puree with other mild, sweet vegetables like sweet potato or butternut squash. These combinations are often a hit with babies due to their similar textures and complementary flavors. For a touch of fruit, apple puree or pear puree can be mixed in to enhance the sweetness and provide different vitamins. Just ensure any new fruit or vegetable has been introduced individually first.
You can also mix carrot puree with breast milk or formula, not just for thinning, but to provide a familiar taste that can make new flavors more appealing. As your baby grows and is ready, you might even combine it with iron-fortified baby cereal or, later on, with pureed chicken or lentils for a more complete meal. The possibilities are endless, making mealtime an exciting journey of discovery for your little one.
The Journey from Puree to Solid Foods: What Comes Next?
Making smooth carrot puree is just the beginning of your baby’s exciting journey with solid foods! As your little one grows and develops, their feeding skills will advance, and they’ll be ready for new textures and challenges. This natural progression is a key part of their development, moving from ultra-smooth purees to more complex consistencies.
After mastering smooth purees, the next step is often to introduce slightly thicker, chunkier textures. For carrots, this might mean mashing them with a fork instead of blending them completely smooth, leaving tiny, soft lumps. This encourages your baby to practice chewing motions, even if they don’t have teeth yet. Continue to observe your baby for signs of readiness – if they seem frustrated by too-smooth textures or are trying to "chew" the puree, they might be ready for more texture.
Eventually, you’ll progress to soft, cooked pieces of carrot that your baby can pick up and self-feed, often referred to as finger foods, or move towards a baby-led weaning approach. This could be small, steamed carrot sticks that are soft enough to squish between your fingers. Remember to always supervise your baby during meals and ensure all food is prepared safely to prevent choking hazards. This gradual transition fosters independence and prepares them for a lifetime of healthy eating.
Summary & Motivation: Your Pureeing Adventure Awaits!
Wow, you’ve just covered everything you need to know about crafting delicious, nutritious carrot puree for your baby! From selecting the freshest carrots and mastering the perfect chop to expertly steaming or boiling them, and then blending them into that dreamy, silky-smooth consistency, you’re now equipped with a wealth of knowledge. We’ve even explored smart storage solutions and creative ways to introduce this wonderful first food to your little one.
Remember, this journey is about nourishing your baby with love and wholesome goodness, one spoonful at a time. It’s a chance to connect, to teach, and to celebrate every tiny milestone as they discover new tastes and textures. Don’t worry about perfection; focus on presence and enjoyment. Every batch you make is a testament to your dedication and care, and that’s what truly matters.
So, take a deep breath, gather your ingredients, and embrace this wonderful chapter. You’ve got this! Your pureeing adventure is ready to begin, and your baby is going to absolutely love the delicious, homemade goodness you create. Go forth and puree with confidence, knowing you’re providing the very best start for your little one’s palate!
Frequently Asked Questions About Pureeing Carrots for Baby
What age can babies eat carrots?
Babies can typically start eating pureed carrots around 4 to 6 months of age, once they show signs of readiness for solid foods, such as good head control, sitting with support, and showing interest in food. Always consult with your pediatrician before introducing any new solid foods.
Do I need to peel carrots for baby food?
Yes, it is generally recommended to peel carrots for baby food. The skin can be tough and fibrous, making it difficult to achieve a smooth puree and potentially posing a choking hazard for new eaters. Peeling also helps to remove any surface impurities.
Can I add breast milk or formula to carrot puree?
Absolutely! Adding breast milk or formula is an excellent way to thin carrot puree to the desired consistency while also adding familiar flavors and extra nutrients. You can also use the reserved cooking water from steaming or boiling.
How long does homemade carrot puree last in the fridge and freezer?
Homemade carrot puree can be safely stored in an airtight container in the refrigerator for up to 3 days. When frozen in airtight containers or freezer bags, it can last for up to 3 months. Always label with the date it was made.
What if my baby doesn’t like carrot puree the first time?
It’s common for babies to reject new foods at first. Don’t be discouraged! It can take multiple exposures (sometimes 10-15 tries) for a baby to accept a new taste. Try offering it again in a few days, perhaps mixed with a familiar food like breast milk, formula, or another puree they enjoy. Keep it positive and pressure-free.
Can I use store-bought baby carrots for pureeing?
While convenient, store-bought "baby carrots" are often larger carrots cut and peeled, and can sometimes be drier or less flavorful than fresh, whole carrots. For optimal taste and texture in your homemade puree, fresh, whole carrots are generally preferred. However, if using pre-packaged baby carrots, ensure they are thoroughly cooked until very tender.