
Sweet Start: Your Ultimate Guide to Making Perfect Pear Puree for Baby
Welcome, new parent! Embarking on the journey of introducing solid foods to your little one is an exciting, yet often daunting, adventure. You might be feeling a mix of anticipation and a touch of overwhelm, wondering where to begin with homemade baby food. Questions like "What foods are safe?", "How do I prepare them?", and "Will my baby even like this?" probably swirl through your mind.
You’re not alone in these thoughts; every parent has navigated this new territory. But imagine the joy and satisfaction of preparing wholesome, natural meals right in your own kitchen, knowing exactly what goes into every spoonful your baby eats. This guide is designed to melt away those worries, offering you a clear, step-by-step path to creating delicious, nutritious pear puree – one of the best first foods for tiny tummies.
By the time you finish reading, you’ll feel confident and inspired, equipped with all the practical tips, tricks, and gentle encouragement you need to whip up batches of sweet, silky pear puree. We’ll cover everything from selecting the best fruit to different cooking methods, ensuring your baby’s first tastes of solids are a delightful and wholesome experience. Let’s make this journey together, one spoonful at a time!
Getting Your Pears Ready for Puree Time
Preparing homemade baby food is a wonderful way to ensure your little one receives the freshest, most wholesome nutrients. Before you even think about cooking, selecting and preparing your pears correctly lays the groundwork for a delicious and safe puree. This initial stage is crucial for both flavor and your baby’s delicate digestive system, setting you up for success.
Don’t fret if you’re new to this; getting your pears ready is simpler than you might imagine, and we’ll walk through each step with ease. Think of it as the foundational layer of a culinary masterpiece for your tiny gourmand. A little care and attention here will pay off immensely when you see your baby’s happy reaction to their first taste of homemade goodness.
From choosing the perfect ripeness to the crucial washing process, every detail matters in creating a pear puree that’s not only tasty but also safe and incredibly nourishing. So, let’s dive into making the best choices for your baby’s palate and well-being, ensuring every spoonful is pure, wholesome delight.
Choosing the Perfect Pears: A Sweet Selection
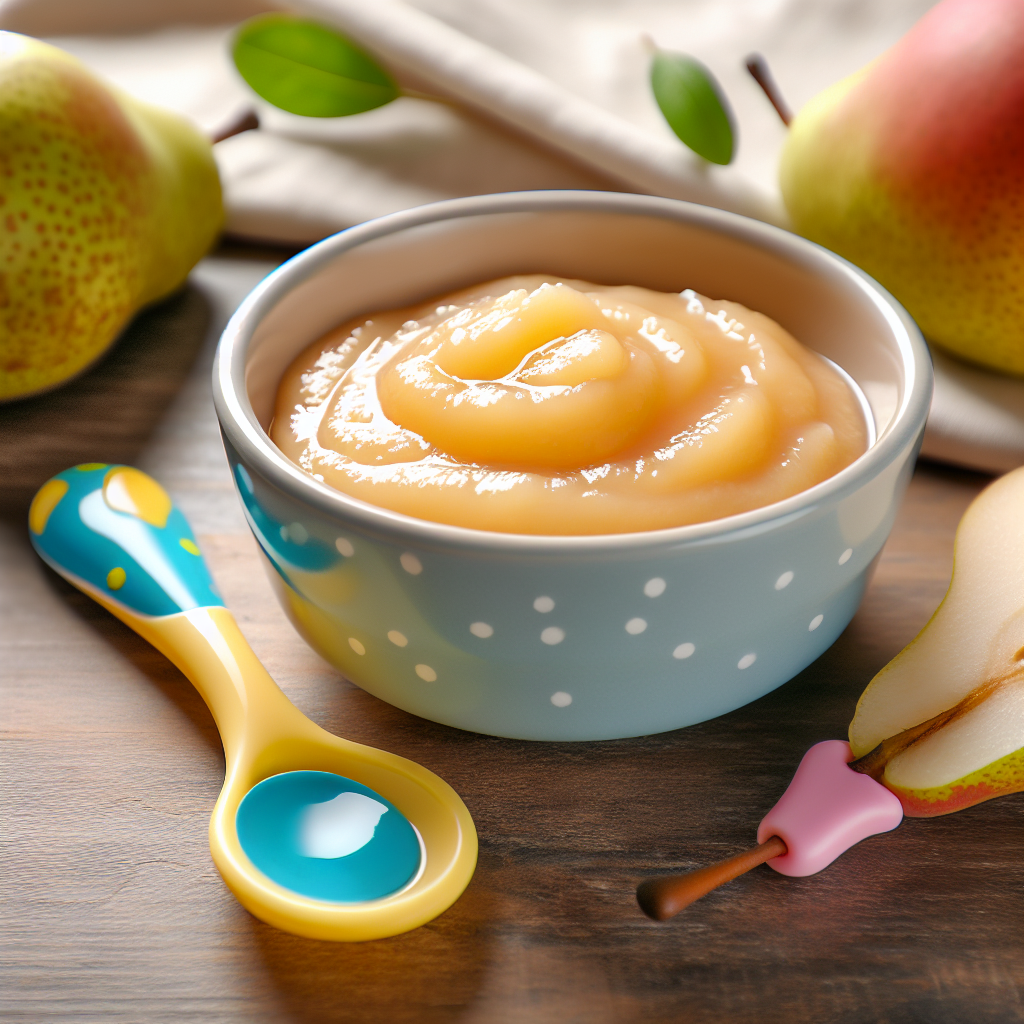
Selecting the right pears is the first step towards a wonderfully delicious puree. You’re looking for pears that are ripe, but not overly soft or mushy, as this balance ensures maximum natural sweetness and a smooth texture after cooking. A perfectly ripe pear will yield slightly to gentle pressure near the stem, indicating it’s ready for consumption and full of juicy goodness.
While many pear varieties work beautifully for baby food, some popular choices include Bartlett, Anjou, Bosc, and Comice. Bartlett pears, for instance, are known for their sweet flavor and soft texture when ripe, making them an excellent choice for pureeing. Anjou and Comice pears also offer a lovely sweetness and smooth consistency, while Bosc pears, though firmer, become beautifully tender when cooked.
When considering organic versus conventional pears, choose what feels right for your family and budget. Organic pears can offer peace of mind regarding pesticide exposure, but thoroughly washing any pear, regardless of its origin, is always a crucial step. Ultimately, the goal is to select healthy, unblemished fruit that promises a naturally sweet and nutritious puree for your little one.
Washing and Preparing: The First Essential Steps
Once you’ve chosen your lovely pears, the next critical step is thorough washing. Even if you’ve opted for organic fruit, pears can carry dirt, bacteria, or residual sprays on their skin. A good rinse under cool running water, combined with a gentle scrub using your hands or a soft vegetable brush, is essential to ensure they are squeaky clean and safe for your baby.
After washing, it’s time to prepare the pears for cooking. You’ll want to peel them, especially for younger babies, as the skin can be difficult to digest and might introduce a grittier texture to the puree. Simply use a vegetable peeler or a small paring knife to remove the skin, working carefully around the pear’s contours.
Once peeled, cut the pears in half or quarters and carefully remove the core and any seeds. A melon baller or a small spoon can be handy for scooping out the tough core. Finally, chop the pear flesh into uniform, roughly one-inch pieces. This consistency ensures even cooking, which is key to achieving that perfectly smooth and creamy texture your baby will love.
Safety First: Allergen Introduction & Choking Prevention
When introducing any new food, including pear puree, observing your baby for any signs of an allergic reaction is paramount. While pears are generally considered low-allergen, it’s always wise to introduce new single-ingredient foods one at a time, waiting 3-5 days before introducing another new food. This allows you to easily identify if a particular food causes any adverse reactions, such as rashes, hives, or digestive upset.
Beyond potential allergens, ensuring the correct texture is vital for choking prevention, especially as your baby transitions to solids. Pear puree should be smooth and free of any lumps, strings, or hard pieces that could pose a choking hazard. If you’re just starting solids, aim for a very thin, almost liquid consistency, gradually thickening it as your baby becomes more accustomed to swallowing purees.
As your baby grows and develops their chewing and swallowing skills, you can gradually introduce thicker purees or even small, soft, mashed pieces of pear. Always supervise your baby closely during mealtimes, regardless of their age or the food’s texture. Staying vigilant and preparing food appropriately ensures a safe and enjoyable feeding experience for everyone involved.
Cooking Methods: Steaming, Baking, & Boiling
Now that your pears are perfectly prepped, it’s time to transform them into that silky-smooth puree your baby will adore. There are several excellent cooking methods, each offering unique benefits in terms of nutrient retention, flavor development, and preparation time. Choosing the right method depends on your priorities and what you have available in your kitchen.
No matter which method you choose, the goal is to soften the pear pieces until they are tender enough to be easily pureed into a smooth consistency. This ensures your baby can safely and comfortably swallow the puree, making their first culinary experiences positive ones. Don’t be afraid to experiment to find your favorite technique!
We’ll explore steaming, baking, and boiling, giving you a clear understanding of how each method works and what kind of result to expect. You’ll find that creating nutritious, homemade pear puree is not only simple but also incredibly rewarding, knowing you’re providing the best for your little one. Let’s get cooking!
Steaming for Nutrient Retention: The Gentle Way
Steaming is often hailed as the gold standard for preparing fruits and vegetables for baby food, and for good reason. This gentle cooking method exposes the pear pieces to hot vapor rather than direct contact with water, which significantly helps to preserve their delicate vitamins, minerals, and natural flavor. It’s a fantastic way to ensure your baby gets the most nutritional punch from every spoonful.
To steam pears, simply place your chopped pear pieces in a steamer basket over an inch or two of simmering water in a pot. Make sure the water doesn’t touch the basket. Cover the pot tightly with a lid and steam for about 5-8 minutes, or until the pears are fork-tender. You’ll know they’re ready when a fork easily slides through the largest piece.
Once steamed, carefully remove the pear pieces and let them cool slightly before transferring them to a blender or food processor. You can add a tablespoon or two of the steaming liquid, breast milk, or formula to achieve your desired consistency. Steaming yields a naturally sweet, vibrantly colored puree that’s packed with goodness and wonderfully smooth.
Baking for Richer Flavor: A Warm Embrace
Baking pears for puree is another excellent method, especially if you’re looking to deepen their natural sweetness and create a richer, more caramelized flavor profile. The dry heat of the oven gently roasts the pears, concentrating their sugars and often resulting in a more complex taste that some babies, and parents, absolutely adore. It’s a wonderful alternative for adding variety to your baby’s palate.
To bake, preheat your oven to 375°F (190°C). Arrange the chopped pear pieces in a single layer on a baking sheet lined with parchment paper. You can lightly drizzle them with water or breast milk if you wish, but it’s not strictly necessary as pears have high water content. Bake for 15-25 minutes, or until the pears are very tender and slightly browned at the edges. The baking time will vary depending on the ripeness and size of your pear pieces.
After baking, let the pears cool a bit before transferring them to your blending device. Just like with steaming, you can add a little water, breast milk, or formula to thin the puree to the perfect consistency. The resulting puree will have a lovely, subtle warmth and sweetness that makes it uniquely delicious and incredibly comforting for your little one.
Boiling for Quick Softening: A Simple Approach
Boiling is a straightforward and quick method for softening pears, making it a convenient choice when you’re short on time. While it might lead to a slight loss of some water-soluble nutrients compared to steaming or baking, it still yields a perfectly soft and mashable pear that’s great for puree. It’s a reliable option for getting those pears ready in a flash.
To boil your pear pieces, place them in a saucepan and add just enough water to barely cover them. Bring the water to a boil, then reduce the heat to a simmer and cook for 5-10 minutes, or until the pears are very tender when pierced with a fork. The cooking time will depend on the ripeness and size of your pear pieces.
Once tender, carefully drain the pears, reserving some of the cooking water. Transfer the cooked pear pieces to your blender or food processor. Use the reserved cooking water, breast milk, or formula to thin the puree to your desired consistency. Boiling results in a soft, mild-flavored puree that’s easy to digest and a great starting point for introducing solids.
Summary & Motivation
You’ve just unlocked the secrets to crafting wholesome, delicious pear puree right in your own kitchen! From carefully selecting the perfect fruit to mastering different cooking methods, you now have the knowledge and confidence to create nourishing meals for your little one. Remember, the journey of introducing solids is about exploration, joy, and providing the very best for your baby.
Every step you take, whether it’s choosing the ripest pear or pureeing to the perfect consistency, is an act of love. Don’t underestimate the power of homemade baby food; it’s a beautiful way to connect with your child’s growth and introduce them to the wonderful world of flavors. You’re not just making food; you’re nurturing a healthy relationship with eating from the very beginning.
So, what are you waiting for? With these practical steps and a dash of enthusiasm, you’re ready to dive in. Grab those pears, pick your favorite cooking method, and let the blending begin. The kitchen awaits your creative touch, and your baby is about to embark on a delicious adventure, all thanks to your loving efforts. Now it’s your turn to make some pear puree magic!
FAQs About Making Pear Puree for Baby
When can babies have pear puree?
Typically, babies can start enjoying pear puree when they are around 4 to 6 months old, or when they show signs of readiness for solid foods. These signs include good head control, the ability to sit up with support, showing interest in food, and losing the tongue-thrust reflex (which pushes food out of their mouth). Always consult your pediatrician before introducing any new foods.
Do I need to peel pears for baby food?
Yes, it’s generally recommended to peel pears for baby puree, especially for younger infants. Pear skin can be tough to digest and may create a gritty texture that’s not ideal for a smooth puree. As your baby gets older and more accustomed to textures, you might gradually introduce very small, well-cooked, unpeeled pieces, but for initial purees, peeled is best.
How long does homemade pear puree last?
Homemade pear puree can be stored in the refrigerator for up to 3 days. For longer storage, you can freeze it in ice cube trays or small freezer-safe containers for up to 3 months. Once frozen, transfer the cubes to a freezer bag for easy portioning. Thaw individual portions in the refrigerator overnight or gently warm them.
Can I mix pear puree with other fruits or vegetables?
Absolutely! Pear puree has a mild, sweet flavor that makes it an excellent base for mixing with other fruits and vegetables. Common delicious combinations include pear and apple, pear and sweet potato, pear and banana, or pear and green beans. Always introduce new foods one at a time to check for allergies before combining them.
What type of pears are best for baby puree?
Many pear varieties work well for baby puree, but some top choices include Bartlett, Anjou, and Comice pears due to their sweet flavor and soft texture when ripe. Bosc pears also work beautifully, becoming very tender when cooked. Look for ripe, unblemished pears that yield slightly to gentle pressure near the stem.
How to store homemade pear puree?
To store homemade pear puree, divide it into small, airtight containers or ice cube trays. For refrigeration, use containers and consume within 3 days. For freezing, fill ice cube trays, freeze until solid, then pop out the cubes and transfer them to a freezer-safe bag. Label with the date and type of food.
Is pear puree good for baby constipation?
Yes, pear puree can be an excellent natural remedy for baby constipation. Pears are rich in fiber and contain sorbitol, a natural sugar alcohol that acts as a mild laxative. This combination helps to soften stools and promote regular bowel movements, making it a gentle and effective choice for keeping your baby’s digestive system happy.