
Cooking Apples for Baby: Your Ultimate Guide to Sweet, Wholesome First Bites
Welcoming your little one to the wonderful world of solid foods is an incredibly exciting milestone, isn’t it? As parents, we often find ourselves brimming with anticipation, a little bit of nervousness, and a whole lot of questions about introducing new flavors and textures safely. You want to offer the very best, something nutritious, easy to digest, and absolutely delicious, but perhaps you’re wondering where to start, what type of apples to pick, or the best way to prepare them to create that perfect, silky-smooth puree your baby will adore.
It’s completely normal to feel a bit overwhelmed by the sheer amount of information out there, or to worry about getting the consistency just right for your baby’s developing palate and tiny tummy. But take a deep breath, because you’ve landed in the perfect spot! This comprehensive guide is designed to melt away those worries, providing you with everything you need to confidently prepare wholesome, homemade apple purees that are not only packed with goodness but also incredibly simple to make. We’ll walk you through selecting the ideal apples, mastering the easiest cooking methods, and even offer clever tips for storage and making mealtime a joyous occasion for both of you.
By the time you finish reading, you’ll be equipped with the knowledge and confidence to transform humble apples into a delightful culinary adventure for your baby, ensuring every spoonful is safe, nutritious, and lovingly prepared. Get ready to embark on this delicious journey – your little one’s happy gurgles are just around the corner, and you’re about to become a baby food maestro!
Choosing and Prepping Apples for Baby Food
Embarking on the journey of making homemade baby food begins with selecting the stars of the show: the apples themselves! This first step is foundational, setting the stage for flavor, texture, and nutritional value. Don’t worry, it’s not as complicated as it sounds; with a few simple guidelines, you’ll be picking the perfect fruit like a seasoned pro, ready to transform them into delicious, wholesome meals for your little one.
Thinking about those tiny taste buds, you’ll want to prioritize apples that are naturally sweet and have a lovely, smooth texture when cooked down. While most apples can be made into baby food, some varieties truly shine, offering a delightful balance of flavor that even the pickiest eater might find appealing. This careful selection ensures that your baby’s first introduction to apples is a positively delightful experience, encouraging them to embrace new foods with enthusiasm and joy.
So, let’s dive into the specifics, making sure you feel absolutely confident from the moment you select your apples at the grocery store or farmer’s market, right through to the moment they’re ready for cooking. Every detail, from variety to proper handling, contributes to the ultimate success and deliciousness of your homemade baby food.
Selecting the Perfect Apple Varieties for Little Ones
When you’re strolling through the produce aisle, you might be surprised by the sheer number of apple varieties available, each with its own unique characteristics. For baby food, we’re generally aiming for apples that are naturally sweet and cook down to a soft, consistent texture without becoming too watery or mushy in an unappealing way. Some apples are tart and firm, which might be lovely for baking pies, but perhaps less ideal for a baby’s first pureed introduction to fruit.
Excellent choices that tend to be naturally sweet and soften beautifully include Gala, Fuji, Golden Delicious, and McIntosh. Gala apples, for instance, are known for their mild sweetness and smooth texture, making them a fantastic starting point. Fuji apples offer a crisp sweetness that translates wonderfully into a mild, pleasant puree, while Golden Delicious are classic for their sweet, mellow flavor and creamy texture when cooked.
While it’s perfectly fine to use conventional apples, many parents opt for organic varieties to minimize pesticide exposure, especially when preparing food for infants. If choosing conventional, a thorough wash is always a good idea. Regardless of your choice, selecting firm, unblemished apples without soft spots or bruises is key to ensuring freshness and optimal flavor for your baby’s meal.
Washing and Peeling Apples Like a Pro
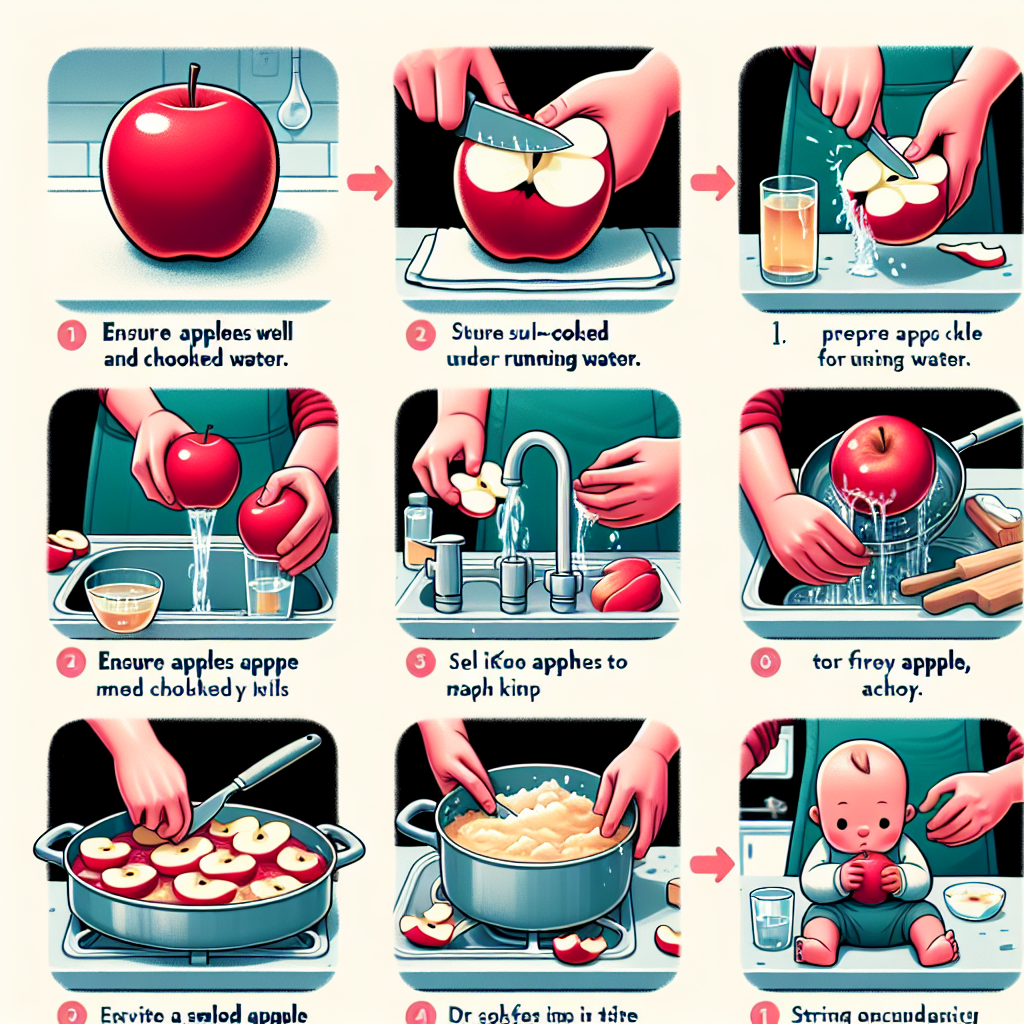
Once you’ve brought your beautiful apples home, the next crucial step is proper washing and peeling. Even if you’ve opted for organic apples, a good wash under cool running water is essential to remove any dirt, dust, or residual contaminants that might be lingering on the skin. You can gently rub the apples with your hands or use a clean produce brush to ensure they are sparkling clean before you move on to the next stage of preparation.
Peeling apples for baby food is highly recommended, if not essential, especially for very young infants. Apple skins, while nutritious for adults, can be tough for a baby’s developing digestive system to process and can introduce unwanted textures into a smooth puree. Plus, even after washing, some pesticide residues might remain on the skin, so removing it offers an extra layer of peace of mind for health-conscious parents.
To peel an apple efficiently and safely, a vegetable peeler is your best friend. It’s much safer and often faster than using a knife. Simply hold the apple firmly and glide the peeler around its circumference, removing the skin in long, continuous strips. Once peeled, you’ll have a pristine, ready-to-cook apple that’s perfectly prepped for your baby’s meal.
Cutting Apples Safely for Baby Food Preparation
After washing and peeling your apples, the final preparatory step before cooking is cutting them into appropriate sizes. The goal here is to create uniform pieces that will cook evenly and quickly, ensuring a consistent texture when pureed. Uneven pieces might lead to some being too hard while others are mushy, making it difficult to achieve that perfectly smooth consistency your baby needs.
First, you’ll want to core the apple to remove the seeds and the tough central core. An apple corer makes this task incredibly simple and quick, but you can also do it by carefully cutting the apple into quarters and then slicing out the core with a small paring knife. Remember to always cut away from your body when using a knife, prioritizing safety in your kitchen.
Once cored, dice the apple quarters into small, roughly one-inch cubes or slices. This size is ideal because it allows for efficient cooking, whether you choose to steam, bake, or boil your apples. Uniform smaller pieces mean they will all soften at a similar rate, leading to a perfectly cooked batch that’s ready for blending into a smooth, delightful puree for your little one.
Easy Cooking Methods for Soft Baby Apple Puree
Now that your apples are sparkling clean, perfectly peeled, and uniformly diced, it’s time for the magic to happen: cooking them until they’re wonderfully soft and ready to be transformed into a smooth puree. There are several fantastic methods to achieve this, each with its own benefits, and all of them are surprisingly easy to execute even on your busiest days. The key is to cook the apples until they are fork-tender, meaning a fork can easily pierce them without resistance.
Choosing a cooking method often comes down to personal preference, the equipment you have on hand, and perhaps even the subtle flavor nuances you wish to achieve. Some methods retain more nutrients, while others might be faster or more hands-off. Regardless of which path you choose, the ultimate goal remains the same: to create a delicious, easily digestible, and nutrient-rich apple puree that your baby will adore.
Let’s explore the most popular and effective cooking techniques, ensuring you feel confident in preparing a variety of textures and flavors. You’ll quickly discover that making your own baby food is not only rewarding but also surprisingly straightforward, paving the way for countless healthy and happy meal times.
Steaming Apples: The Gentle Path to Smooth Puree
Steaming is hands down one of the most recommended methods for cooking apples for baby food, and for good reason. This gentle cooking technique helps to preserve the maximum amount of vitamins and nutrients in the fruit, as the apples aren’t submerged directly in water where valuable water-soluble vitamins could leach out. It also results in a beautifully soft texture that’s perfect for pureeing, maintaining a vibrant color and fresh taste.
To steam apples, you’ll need a steamer basket and a pot with a lid. Simply add an inch or two of water to the pot, making sure the water doesn’t touch the bottom of the steamer basket. Place your diced apples into the steamer basket, pop the lid on, and bring the water to a gentle boil. The steam will then work its magic, softening the apples without overcooking them.
Steaming usually takes about 8-15 minutes, depending on the apple variety and the size of your diced pieces. You’ll know they’re ready when they are fork-tender and easily mashable. Once cooked, carefully remove the steamer basket, let the apples cool slightly, and then transfer them to a blender or food processor. You can add a tablespoon or two of the steaming water, breast milk, or formula to achieve your desired smooth, silky consistency.
Baking Apples: A Flavorful and Simple Approach
Baking apples offers a wonderful alternative, especially if you love the idea of a slightly richer, more concentrated flavor profile for your baby’s puree. When apples are baked, their natural sugars caramelize slightly, intensifying their sweetness and creating a depth of flavor that’s truly delightful. This method is also incredibly hands-off, making it perfect for busy parents who appreciate the oven doing most of the work.
To bake apples for baby food, preheat your oven to around 375°F (190°C). Arrange your diced, peeled, and cored apple pieces in a single layer on a baking sheet lined with parchment paper for easy cleanup. You can add a tiny splash of water (about 1-2 tablespoons) to the baking sheet to create a little steam, which helps keep the apples moist and prevents them from drying out during the baking process.
Bake for about 15-25 minutes, or until the apples are incredibly tender and easily pierced with a fork. The exact time will vary based on your oven and the apple variety. Once baked, remove them from the oven and let them cool for a few minutes before transferring them to your blending device. Just like with steaming, you can add a touch of water, breast milk, or formula to achieve the perfect puree consistency, resulting in a wonderfully aromatic and sweet baby food.
Boiling Apples: Quick and Easy Puree in Minutes
Boiling apples is perhaps the quickest and most straightforward method, ideal for those times when you need a batch of baby food ready in a flash. While some nutrients might be lost to the water compared to steaming or baking, it’s still a perfectly viable and widely used method that yields a beautifully soft, mashable apple. Don’t let the simplicity fool you; it delivers perfectly good results for your little one!
To boil apples, place your diced, peeled, and cored apple pieces into a saucepan. Add just enough water to barely cover the apples – you don’t want to drown them, as that would dilute the flavor and nutrients too much. Bring the water to a boil, then reduce the heat to a simmer, covering the pot with a lid.
Simmer the apples for about 5-10 minutes, or until they are very tender and easily pierced with a fork. Keep an eye on them to prevent overcooking, which can make them too watery. Once cooked, carefully drain the apples, reserving some of the cooking water. Transfer the cooked apples to your blender or food processor, and blend until smooth, adding small amounts of the reserved cooking water, breast milk, or formula as needed to reach your desired consistency.
Pureeing and Storing Your Homemade Apple Delight
Once your apples are perfectly cooked and delightfully tender, the next exciting step is transforming them into that smooth, luscious puree your baby will adore. This is where you get to customize the texture, from a silky-smooth consistency for tiny beginners to a slightly chunkier mash for older, more experienced eaters. Don’t be afraid to experiment a little; you’re creating something truly special and personalized for your little one.
Beyond the blending, thinking about how to store your freshly made apple puree is just as important. Preparing in batches can be a huge time-saver, allowing you to have healthy, homemade options readily available even on the busiest days. Proper storage ensures freshness, retains nutrients, and most importantly, keeps your baby safe from spoilage.
So, let’s dive into the art of pureeing and the practicalities of storage, making sure every drop of your lovingly prepared apple goodness is enjoyed to its fullest. You’re doing an amazing job, and these tips will help you feel even more empowered in your baby food journey!
Achieving the Perfect Puree Consistency
The ideal consistency for apple puree depends entirely on your baby’s age and stage of development. For infants just starting solids (usually around 4-6 months), a very smooth, almost liquid consistency is best. This allows them to easily swallow without any lumps, which can be a choking hazard for beginners. As they grow and gain experience with solids, typically around 7-9 months, you can gradually introduce slightly thicker or chunkier purees to encourage chewing and oral motor skill development.
To achieve a silky-smooth puree, transfer your cooked, cooled apples into a blender, food processor, or even use an immersion blender directly in the pot. Start blending on a low setting, gradually increasing speed if needed. For very young babies, you’ll want to add a liquid to help reach that smooth, runny consistency. This could be a little of the water used for steaming or boiling, breast milk, or formula. Start with a tablespoon or two and add more, spoonful by spoonful, until you reach your desired consistency. Avoid adding too much liquid at once, as you can always add more but can’t take it away!
For older babies ready for more texture, you might use less liquid or even opt for a potato masher instead of a blender to create a chunkier, mashed consistency. This encourages them to use their gums and eventually teeth. Remember, always supervise your baby during meal times, especially when introducing new textures, and ensure the consistency is appropriate for their current abilities.
Smart Storage Solutions for Homemade Puree
Once you’ve lovingly prepared your apple puree, you’ll want to store it properly to maintain freshness and make future meal times a breeze. Homemade baby food, like any fresh food, has a limited shelf life, so smart storage is key to preventing waste and ensuring safety. Batch cooking is a fantastic strategy here; spending an hour or two making a larger batch means you have healthy meals ready for days or even weeks!
For immediate use, you can store apple puree in an airtight container in the refrigerator for up to 3-4 days. Glass containers or BPA-free plastic containers are excellent choices. Labeling with the date prepared is a habit you’ll thank yourself for later, especially when you have multiple types of purees in the fridge. This simple step helps you keep track of freshness and ensures nothing goes to waste.
For longer-term storage, freezing is your best friend! Spoon the cooled apple puree into ice cube trays. Once frozen solid (usually after a few hours), pop the frozen cubes out and transfer them to freezer-safe bags or containers. Label them clearly with the date and contents. These frozen apple cubes can be stored in the freezer for up to 3 months, providing convenient, perfectly portioned meals whenever you need them.
Reheating and Serving Your Apple Puree
When it’s time for your little one to enjoy their delicious apple puree, proper reheating and serving are the final steps. If you’re using refrigerated puree, simply scoop out the desired amount into a baby-safe bowl. If you’re using frozen cubes, take out the number of cubes you need (typically 1-2 cubes per meal, depending on your baby’s appetite) and place them in a bowl.
To reheat, you can gently warm the puree in a small saucepan over low heat, stirring constantly, or use a microwave. If microwaving, always use a microwave-safe dish and heat in short bursts (15-20 seconds), stirring well between each burst to ensure even heating and eliminate any hot spots. Microwaves can create unevenly heated food, which can be dangerous for a baby’s sensitive mouth. Always stir thoroughly and test the temperature on your wrist before offering it to your baby – it should be lukewarm, not hot.
Once reheated and tested, your homemade apple puree is ready to be served! Offer it to your baby with a soft-tipped baby spoon, watching for their cues of hunger and fullness. Remember, mealtimes are about exploration and enjoyment, so keep it positive and fun. Don’t worry if they don’t eat much at first; every little bit is a step forward in their amazing journey with solid foods.
Creative Ways to Serve Apple Puree and Beyond
Congratulations, you’ve mastered the art of making delicious apple puree! But the journey doesn’t stop there. As your baby grows and develops, so too can their culinary adventures. Apple puree is incredibly versatile, serving not just as a standalone meal but also as a fantastic base or addition to a variety of other foods. This flexibility makes it a staple in any baby food repertoire, allowing you to introduce new flavors and textures gradually and excitingly.
Beyond just spoon-feeding, thinking creatively about how to incorporate apple puree can make mealtimes more engaging and help expose your baby to different ways of enjoying food. Whether it’s mixing with other fruits and vegetables or even incorporating it into more complex dishes as they get older, the possibilities are endless. This approach not only expands their palate but also makes your life easier by utilizing one of your homemade staples in multiple ways.
So, let’s explore some wonderful ideas to keep apple puree exciting and nutritious, ensuring your baby continues to look forward to every spoonful. You’re building a foundation for healthy eating habits, and these creative serving suggestions will help make that journey even more enjoyable for both of you.
Mixing and Matching for New Flavors
One of the most exciting aspects of homemade baby food is the ability to create unique flavor combinations. Apple puree, with its mild sweetness and smooth texture, is an excellent base for introducing new fruits and vegetables. This strategy helps babies accept less sweet or more earthy flavors by pairing them with a familiar and beloved taste. It’s a gentle way to expand their palate without overwhelming them.
Consider blending apple puree with other cooked fruits like pears, peaches, or blueberries for a delightful fruit medley. The sweetness of the apple balances out the other flavors beautifully. For a nutrient boost and to introduce vegetables, try combining apple with cooked carrots, sweet potatoes, butternut squash, or even green beans. For example, apple and sweet potato puree is a classic combination, offering a creamy texture and a rich, sweet-savory flavor that babies often adore.
When introducing new combinations, start by mixing a small amount of the new food with a larger proportion of apple puree. Gradually increase the amount of the new food over several days, observing your baby for any signs of allergies or sensitivities. This systematic approach helps you identify potential issues and ensures a smooth transition to a wider variety of tastes and nutrients.
Introducing Textures and Beyond Puree
As your baby grows, usually around 8-10 months, their oral motor skills develop, and they become ready for more textured foods. This is a crucial step in preparing them for table foods and independent eating. Apple puree can easily evolve with your baby, transitioning from super smooth to chunkier mashes, and eventually to small, soft pieces they can pick up themselves.
To transition from smooth puree, simply use less liquid when blending, or opt for mashing with a fork or potato masher instead of a blender. This creates small, soft lumps that encourage your baby to use their gums for mashing. You can also mix soft-cooked, very finely diced apple pieces into a smooth puree to introduce texture gradually. Always ensure the pieces are small enough to prevent choking hazards.
For babies ready for finger foods (typically around 9-12 months, or when they develop a pincer grasp), you can offer small, soft-cooked apple pieces that they can pick up themselves. Ensure these pieces are no larger than a pea and very soft. Applesauce (which is essentially apple puree) can also be served on pre-loaded spoons for baby-led weaning, or spread thinly on soft toast or pancakes for older babies, expanding their mealtime experiences beyond just spoon-feeding.
Apple Puree in Toddler & Family Meals
The versatility of homemade apple puree extends far beyond baby’s first meals. As your little one transitions into toddlerhood and beyond, this wholesome ingredient can continue to be a valuable addition to family meals, adding natural sweetness and moisture. It’s a fantastic way to incorporate fruit into your family’s diet without adding refined sugars, making healthy eating delicious and easy for everyone.
Think of apple puree as a natural sweetener and moistening agent in baking. You can substitute a portion of the oil or sugar in muffin, pancake, or quick bread recipes with apple puree. This adds fiber and vitamins while reducing unhealthy fats and sugars. For instance, try adding half a cup of apple puree to your morning pancake batter for a subtly sweet and moist breakfast treat that even adults will love.
Apple puree can also be stirred into oatmeal or yogurt for a quick and nutritious breakfast or snack. It makes a wonderful natural topping for plain yogurt, adding sweetness without the need for added sugars found in many flavored yogurts. You can even use it as a base for healthy fruit leathers or as a side dish for roasted meats, proving that this simple homemade puree truly has a place in the whole family’s healthy eating routine.
Your Apple Puree Success: A Confident Step Forward
You’ve just navigated the wonderful world of preparing homemade apple puree for your baby, and look at you go! From selecting the perfect sweet varieties to mastering various cooking methods and smart storage, you’ve gained invaluable knowledge and practical skills. This journey, while seemingly simple, is a powerful step in providing your little one with wholesome, nutritious, and lovingly prepared meals right from your own kitchen. You’re not just making food; you’re building a foundation of healthy eating habits and creating beautiful, nourishing moments.
Remember, every step you take, every apple you peel, and every batch you puree is an act of love and dedication. Don’t worry about perfection; focus on the progress and the joy your baby finds in exploring new tastes and textures. The journey of introducing solids is about discovery, patience, and celebrating those adorable messy faces and happy gurgles.
So, take a moment to appreciate your accomplishment, and feel empowered by your newfound expertise. You’ve got this, and you’re doing an amazing job! Now, it’s your turn to put these tips into action. Grab those apples, pick your favorite cooking method, and get ready to create some delicious, wholesome magic for your little one. Happy cooking, and even happier feeding!
Frequently Asked Questions About Cooking Apples for Baby
Q: What kind of apples are best for baby food?
A: For baby food, it’s best to choose apple varieties that are naturally sweet and cook down to a soft, smooth consistency. Excellent choices include Gala, Fuji, Golden Delicious, and McIntosh apples. These varieties tend to be less tart and have a pleasant flavor that babies typically enjoy, making them ideal for purees.
Q: Do I have to peel apples for baby food?
A: Yes, it is highly recommended to peel apples when preparing them for baby food, especially for infants just starting solids. Apple skins can be difficult for a baby’s immature digestive system to process and can pose a choking hazard due to their fibrous texture. Peeling also helps to remove any potential pesticide residues.
Q: How long do I need to cook apples for baby food?
A: The cooking time for apples depends on the method you choose and the size of your diced pieces.
- Steaming: Typically takes 8-15 minutes.
- Baking: Usually 15-25 minutes at 375°F (190°C).
- Boiling: Often the quickest, taking about 5-10 minutes.
In all methods, the apples are ready when they are very tender and can be easily pierced with a fork.
Q: Can I mix apple puree with other fruits or vegetables?
A: Absolutely! Apple puree is a wonderfully versatile base for combining with other fruits and vegetables, which is a great way to introduce new flavors and increase nutrient intake. Popular combinations include apple with pears, peaches, sweet potatoes, carrots, or butternut squash. Always introduce new foods one at a time to monitor for any allergic reactions.
Q: How long can homemade apple puree be stored?
A: Homemade apple puree can be stored in an airtight container in the refrigerator for up to 3-4 days. For longer storage, it can be frozen in ice cube trays and then transferred to freezer-safe bags or containers. Frozen apple puree can maintain its quality for up to 3 months, providing convenient, pre-portioned meals whenever you need them.